Have you ever found yourself manually sending reminders after someone books an appointment with you through Calendly? If you’re managing multiple meetings, this process can quickly become overwhelming.
In this article, we’ll show you how to save time and effort by sending automated email reminders for Calendly meetings booked through your WordPress website.
How Sending Reminders Improves Attendance and Engagement
1. Reduces No-Show Rates
Life gets busy, and people can easily forget about an upcoming meeting. Sending a reminder ensures they remember, increasing the likelihood that they’ll attend.
2. Minimizes Last-Minute Cancellations
Reminders make it easier for invitees to decide whether they’ll still attend or need to cancel. If they choose to cancel, you’re notified in advance, allowing you to adjust accordingly.
3. Improves Engagement and Demonstrates Professionalism
Reminders show that you’re organized and value the invitee’s time. It sets a positive tone, as opposed to simply showing up unannounced or without prior communication.
How to Send Automated Email Reminder for Calendly Meetings Without Workflows
Although Calendly Workflows allow you to set up reminders directly from your Calendly account, EMC Pro offers a simpler solution for those using a WordPress website.
Step 1: Purchase an EMC Pro License
Embed Calendly faster with the EMC Pro plugin by firstly installing and setting up the free version of EMC, and then upgrade to the premium version.
When purchasing EMC Pro, choose either the Standard or Agency plan, both of which include automated and manual email reminders. Once your license is purchased, proceed to Step 2.
Step 2: Activate Your License
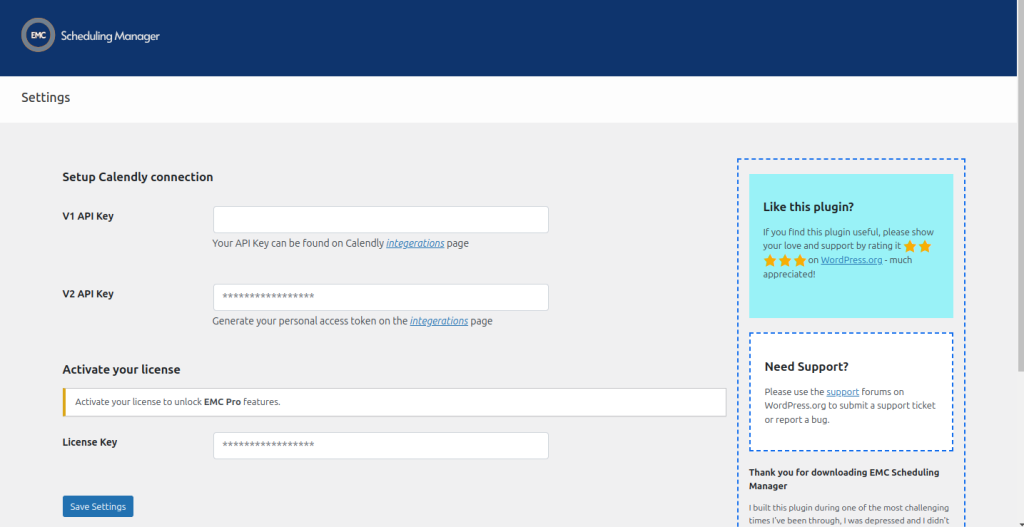
In your WordPress dashboard, go to EMC > Settings from the side menu. Enter your license code in the designated field and save the settings.

Step 3: Enable the Email Reminder Feature
After saving the settings, the page will refresh, and the Email Reminder Settings options will appear.

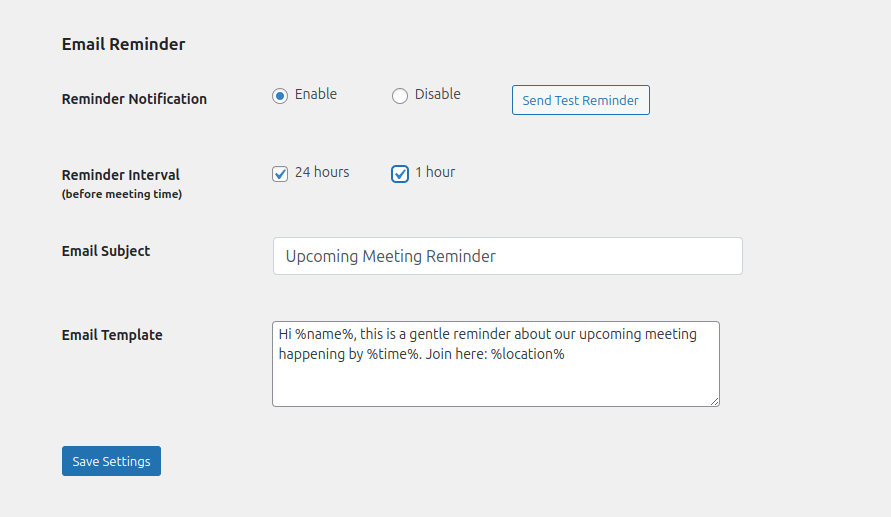
Select Enable next to the Reminder Notification option to activate automated reminders.
Mark the checkboxes for the 24 hours and 1 hour options to schedule reminders 24 hours or 1 hour before the meeting.
In the Email Subject field, enter your preferred email subject, or keep the default option if it works for you.
Use the Email Template field to customize your email body. EMC provides default tags to personalize your messages, such as:
%name% – Automatically fills the invitee’s name.
%time% – Displays the meeting time.
%location% – Includes the location link.
%location_url% – Displays the location link as plain text.
You can design your email template using a free tool like EcoSend. Once your design is ready, click Copy HTML Code and paste it into the Email Template field on the EMC Settings page.
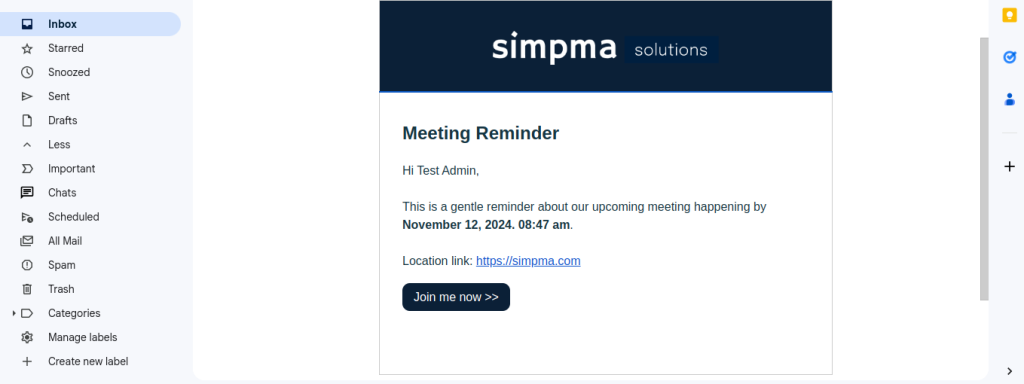
Once you’re done, save the settings. Then you can use the Send Test Reminder button to send yourself a test mail and preview how the reminders will appear to invitees.
From this point, automated email reminders will be sent for every meeting booked through your WordPress website.

Conclusion
In just three simple steps, you can set up automated email reminders for your Calendly meetings directly within WordPress.
TROUBLESHOOTING TIPS
If you’re experiencing issues with the reminder feature, follow these steps to resolve them:
Sync Your Calendly Account
- Ensure you’ve added your Calendly V2 API Key on the EMC Settings page.
- Navigate to EMC > Event Types, then click the Sync button.
- Confirm that event types from your Calendly account have been successfully fetched. If so, the synchronization is complete.
Activate the Reminder Feature
- On the EMC Settings page, ensure the Enable option is selected under Reminder Activation.
- Verify that at least one interval checkbox (e.g. 24 hours or 1 hour) is checked to enable reminders.
Having questions or need support? Get in touch with our customer support.
