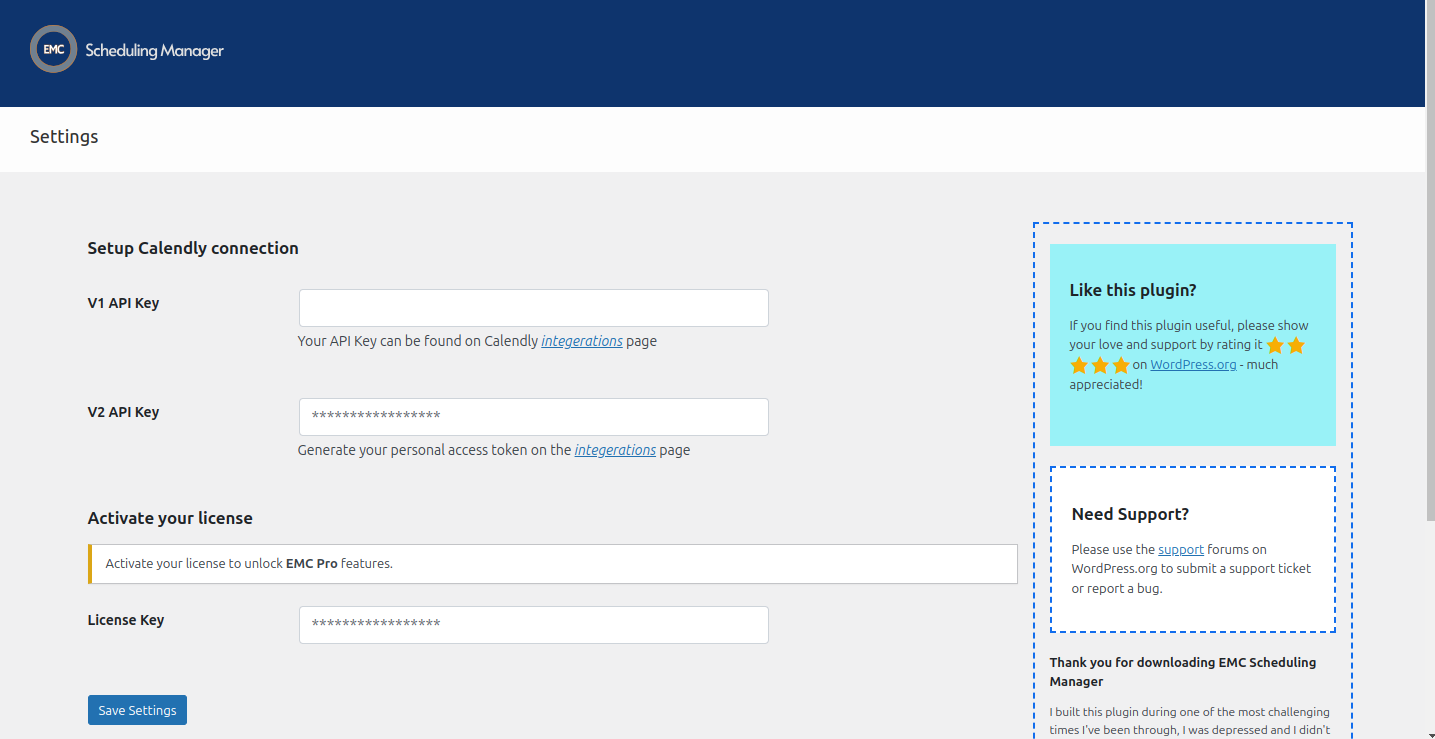
To install and setup EMC Pro, after purchasing a license, visit your customer account page, and click on the “Licenses” tab. Copy your purchased license key here.
If you didn’t download the plugin after purchase, you can click on the “Downloads” tab to do this.
Now that you have the plugin file and your license key, on your website, go to the plugin install page, and upload the plugin file you downloaded earlier.
After installation, activate the plugin, and then go to EMC Scheduling Manager Settings page(EMC > Settings).

Paste your license key in the license key tab as shown above, and add your Calendly V2 API key also, then click “Save Settings”.
After updating the settings, the page will reload. Enable the pro features you need, then navigate to EMC Settings > Event Types and click the Sync button to ensure your Calendly integration is properly synced and all features function as intended.
Standard or Agency Plan customer? See how to activate the advanced features
If you have questions or need support, kindly reach out here.
