If you’ve already created a Calendly account and set up your event types, the next step is getting your scheduling live on your website. In this guide, you’ll learn how to embed Calendly in WordPress — with or without using a plugin.
Whether you’re a coach, consultant, legal professional, or online service provider, embedding a scheduling system directly on your WordPress site can help you capture more leads and eliminate back-and forth emails.
If you’re also looking to embed Calendly in WordPress without affecting your site’s performance, this guide covers both manual embed methods and plugin-based solutions to ensure your booking system stays fast and reliable.
Table of Contents
- Why Embed Calendly in WordPress?
- Two Ways to Embed Calendly in WordPress
- Method 1: Embed Calendly Manually (No Plugin)
- Method 2: Embed Calendly Using a WordPress Plugin
- Manual Embed vs Plugin-Based Embed
- How to Add Calendly in WordPress Without Slowing Your Site
- Conclusion
Why Embed Calendly in WordPress?
Relying solely on contact forms for scheduling often leads to long email threads, missed messages, and delayed bookings.
By embedding Calendly directly on your WordPress site, visitors can view your availability and book meetings instantly—making them far more likely to follow through.
Key takeaway: Embedding Calendly in WordPress gives you automated bookings, clear availability, and a smoother experience for both you and your clients.
Two Ways to Embed Calendly in WordPress
There are two common ways to add Calendly to a WordPress site:
- Using Calendly’s embed code (manual method)
- Using a WordPress plugin designed for Calendly integration
Method 1: Embed Calendly Manually (No Plugin)
Calendly provides embed code that you can paste directly into your WordPress pages. This method works, but offers limited control once it’s live.
How to get the Calendly embed code:
- Log in to your Calendly account
- Open your Event Types
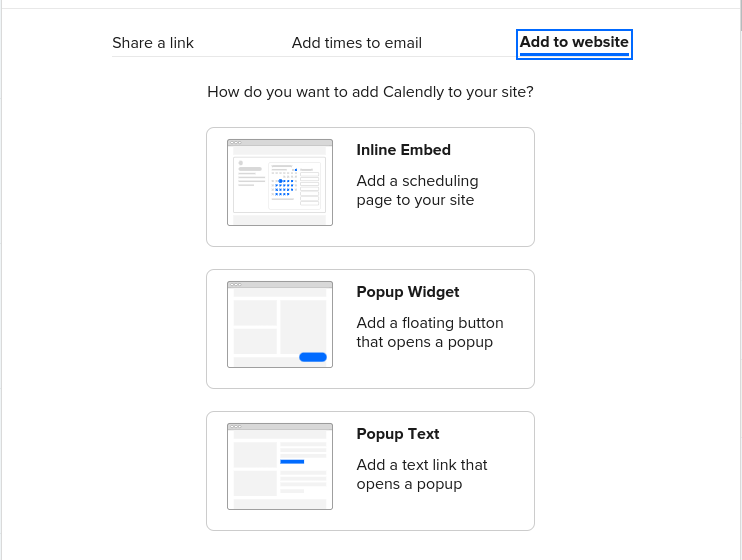
- Click Share under the event
- Select Add to Website
- Choose a display type and copy the embed code

Embed Calendly Using the Classic Editor
Switch to the Text tab and paste the embed code directly into the editor.
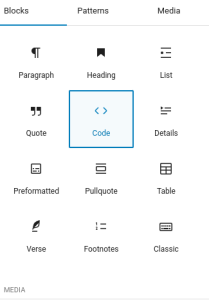
Embed Calendly Using Gutenberg
Add a Custom HTML block, paste the embed code, and publish.

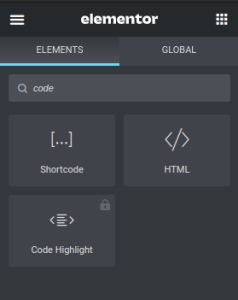
Embed Calendly Using Elementor
Drag in an HTML widget, paste the embed code, and update the page.

Method 2: Embed Calendly Using a WordPress Plugin
Using a plugin is the easiest way to embed Calendly in WordPress while keeping everything manageable inside your dashboard.
A plugin like EMC Scheduling Manager lets you embed Calendly using shortcodes, customize the widget appearance, and manage bookings without switching tabs.
Steps:
- Install and activate the plugin
- Connect your Calendly account using your API key
- Import your event types automatically
- Copy the generated shortcode and embed it anywhere on your site

This approach is ideal if you want more control, better performance, and fewer moving parts long-term.
For more plugin based options, here are the best Calendly WordPress plugins compared.
Manual Embed vs Plugin-Based Embed
| Feature | Manual Embed | WordPress Plugin |
|---|---|---|
| Setup | Copy & paste embed code | Shortcode or widget |
| Customization | Very limited | Controlled inside WordPress |
| Booking Management | Calendly dashboard only | Inside WordPress |
| Best For | Simple, one-off embeds | Growing service businesses |
If you plan to rely on scheduling as part of your business, a dedicated Calendly WordPress plugin is usually the better long-term option.
How to Add Calendly in WordPress Without Slowing Your Site
Your site’s performance directly affects user experience and search rankings. A slow page, even by a second or two, increases bounce rate and reduces conversion. When embedding tools like Calendly, you need to ensure your booking process doesn’t cost you traffic.
1. Use the Calendly Embed Code
The fastest way to add Calendly is by using its native HTML embed code. Here’s how:
- Go to your Calendly dashboard and click “Share.”
- Choose the “Embed on your website” option.
- Copy the code for “Inline Embed,” “Popup Widget,” or “Popup Text.”
- Paste this code into a WordPress HTML block where you want it to appear.
Pro tip: Use the Popup Text or Widget options so Calendly only loads when someone clicks it. This reduces the initial page load weight.
2. Use the Calendly WordPress Plugin
You can embed Calendly quickly with our lightweight plugin. It’s beginner-friendly and doesn’t add extra JavaScript across pages without the booking embed.
3. Integrate Calendly with a Lightweight Code Snippet
If you want more control and you understand how to code, you can add the Calendly embed script conditionally using functions.php or a page builder with dynamic script loading.
<script src="https://assets.calendly.com/assets/external/widget.js" async></script>Use this script only on specific pages, and delay its load using tools like Asset CleanUp or Perfmatters.
How To Add Calendly in WordPress Without Slowing Your Site
Once Calendly is embedded, here are a few things you can do to prevent your site from slowing down:
- Use lazy loading: Delay Calendly’s JavaScript with a performance plugin.
- Minimize third-party scripts: Don’t stack too many embeds on one page.
- Cache the page: Enable full-page caching so returning users see the fastest version.
- Use a fast theme: If your theme is already heavy, Calendly can make things worse. Use a lightweight theme like Astra or GeneratePress.
Best Pages to Put Calendly in WordPress Without Slowing Your Site Down
To avoid performance issues across your entire site, consider embedding Calendly only on:
- Dedicated booking pages (e.g.,
/book-now) - Contact or service pages with high intent
- Thank you pages with follow-up scheduling
Try not to put the Calendly embed code in the footer or on every page unless it’s lazy loaded.
Conclusion
You can embed Calendly in WordPress using either method, but the right choice depends on how much control and flexibility you want.
For basic use, the manual embed works. For professionals who want to streamline scheduling and manage everything from WordPress, a plugin-based approach is far more efficient.